In our office we got a dev server running centos. It is server grade machine with ECC ram and SAS hard drive. The problem with that it used to use by one dev. As the team is expanding, we need more dev server to test our code. Because I am familiar with SmartOS so we will use SmartOS as the hypervisor.
Preparation
Clone Disk
We need to do a clone on our hard disk. Since we only have one SAS hard drive with 1 partition, I need to plug in a external hard drive to clone the drive.
First we boot into GParted with live CD.
Then we issue this command
# dd if=/dev/sda of=(external harddrive) bs=1M
Erase Disk
After the disk clone we can plug in the SmartOS live usb and format the hard drive.
Create KVM
After SmartOS installation, we now create a new KVM
I played around with gruff today. The final result is really impressive. Especially it can visualize data from your database in the way you want.
Before you install this gem. You need to install few extra things. They are imagemagick, ghostscript. On Mac OSX you need to do
brew install imagemagick ghostscript
After installing both packages, you can run bundle install
Usage
To generate a graph you need to
12345678910111213141516171819202122232425262728
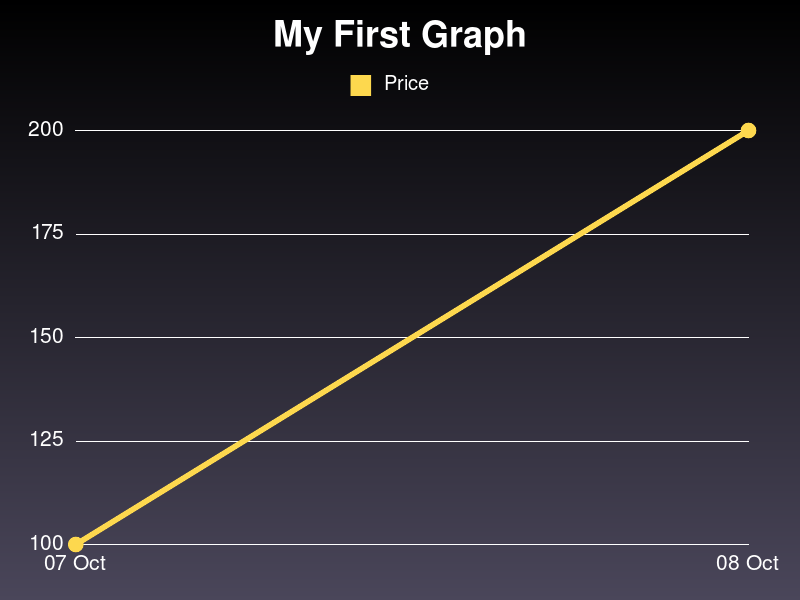
require"gruff"require"date"# Create the graph objectg=Gruff::Line.new# Set the titleg.title="My First Graph"# Let say we have a data hash# The element is like {Date => Integer}today=Date.todayyesterday=Date.today.prev_daydata={yesterday=>100,today=>200}# We need to set the x-axis labels# It need to be a Hash { 0 => "name 1", 1 => "name 2", … }# We need to do a little bit of data transform here.g.labels=Hash[(0...data.keys.size).zipdata.keys.map{|day|day.strftime("%d %b")}]# => {0=>"07 Oct", 1=>"08 Oct"}# Then we need to set the y-axis, we need to give it a nameg.data:Price,data.values# Write the generated graph to a fileg.write"gruff.png"
Vagrant provides easy to configure, reproducible, and portable work environments. In other words, It creates a VM for development.
I use vagrant to do my development in the past year. Slowly learning all the pros and cons of vagrant when using it for development. Vagrant use VirtualBox as a VM host. There is a problem about the license of the guest addition of VirtualBox. If I want to use it commercially I need to purchase a license from Oracle(USD50 for 100 end users). Problem is 100 licenses min buy.
Vagrant can use VMWare as a host
Later version of vagrant abstract the VM provider as a provider plugin. This open the possibility to support other hypervisor.
I tested it for almost 2 days. Everything works fine. I can do vagrant sshvagrant upvagrant halt.
The site provide one box for you to use. The box for vagrant-paralles is a bit special. I want Ubuntu 12.04.3 LTS for one of my project. So I decided to build the box myself.
Veewee easy way to build vagrant box
Veewee is a tool for easily (and repeatedly) building custom Vagrant base boxes, KVMs, and virtual machine images.
Veewee supports parallels export 15 days ago. It got almost all the common linux distribution.
Building my own parallels box is not that easy
First, you need to install the parallels SDK for python. If you are using homebrew version of python you need to symlink the SDK separately.
Wait a while the os is installing. Here comes with a gotcha. If you get stuck in install grub-pc, you need to reboot you mac. I don’t know why but it works. I also found we cannot do unattended install of Parallels tools. After the build is complete, do not shutdown the instance. Install the tools using ssh with vagrant/vagrant login.
I deployed my blog on github. So I can’t use DNS verification. I used HTML verification. It require you to put a specific html file on your root directory.
How to add the file in Octopress
I tried to place the file in /public folder every time before I run rake deploy to deploy my blog. This method is too much trouble and sometime I will forget to do it.
To solve this problem, go to _config.yml file in Octopress.
Add this line:
include: ["googlexxxxxx.html"]
And place the googlexxxxxx.html file under source directory.
You can try to remove the whole public directory and run rake generate. You will see the google html file is also inside.
I have joined a local AD network company as a senior developer(who got out of college one year ago). I joined this company for more than half a year. Mainly working on cleaning the code and infrastructure. I redesign the AD selection algorithm and implement it. I have learned a lot from this practice. Geo targeting is one of the selection criteria.
I received a support ticket from our operation team last week. We have launched a new campaign targeting US internet user but we are recording HK IP address. The first thought that struck me was I messed up the implementation(some background information: my new algorithm is testing on production. There is no time for proxy shadowing or mock test. SHIP IT before test it!).
I rethink the whole logic in my head step-by-step. The truth is I don’t know what happen. Large scale production system is a beast. I still find myself clueless on other parts of the system.
I didn’t manage to figure out what happen so our team decided to checkout all the statistic we’ve got dig deeper to see what happen.
Cloudflare is caching javascript
I visited the publisher site and found out our script tag type become ‘text/rocketscript’. After some googling it is a thing called RocketLoader from Cloudflare.
This thing messes up with geo targeting for all of our ads. After some research, AdvretServe and Google Adsense are also having this problem.
Our javascript content is different per request. Cloudflare execute our javascript and save it. I know static content should use CDN to speed up things. But some ad network is not using static js. I don’t know much but at least all the 3-rd party agency we worked with are using dynamic js.
Solution (which is not really a solution)
We need to ask publisher to disable Cloudflare. Cloudflare not only affect geotargeting campaign. We later find out that it also lower the publisher total ad serve. We are still investigating what’s the issue. But we will list Cloudflare as not compatible with our network.
SecureNAT is a fairly simple way to setup Softether. You don’t need a lot of sysadmin skill and network understanding in order to get Softether up and running.
The problem is SecureNAT is a bit SLOW. I will show a comparison at the end of this article.
We can boost the performance using a local bridge.
Softether using local bridge
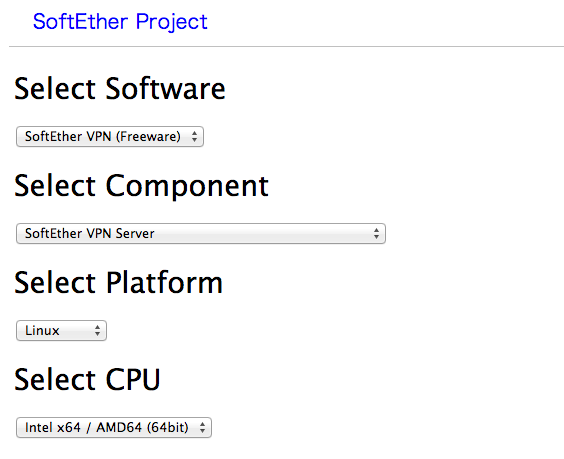
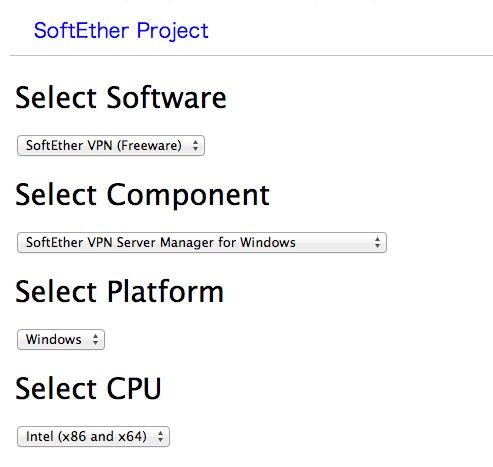
To start with you need Softether installed and setup. You can follow the guide on Softether on VPS
Just skip the last step “Enable the Virtual NAT”
Local bridge Setup
Network setup
VPN Server IP: 192.168.7.1
VPN Client IP Range: 192.168.7.50-192.168.7.60
Tap Device name: tap_soft
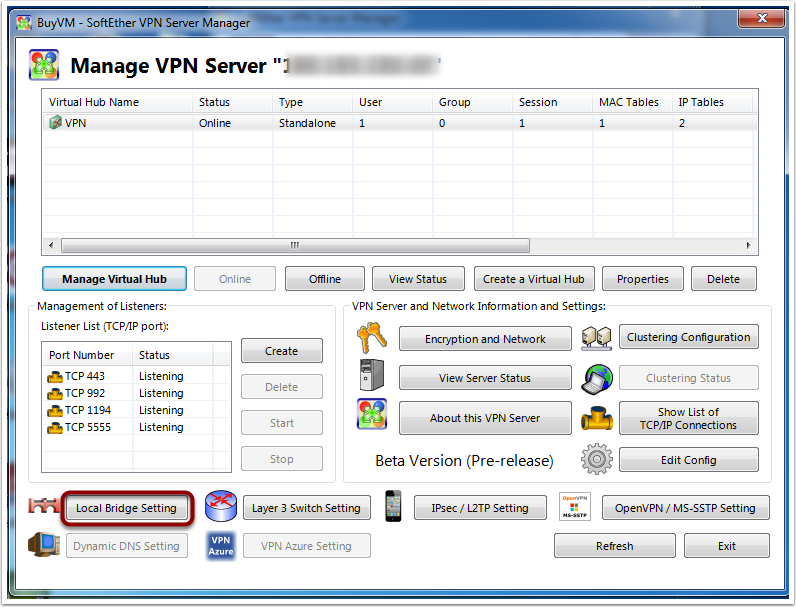
From here we go to the “Local Bridge Setting”
First we choose the Virtual Hub. It should be only one for normal setup.
Then we check the tap device box.
After that we type in the name of the tap device(I use soft here for simplicity).
After the creation of the local bridge we jump back to our server. And run
1
# ifconfig tap_soft
It should show you something similar to this
Because we are not going to use SecureNAT and SecureDHCP. We need to install a DHCP server on our VPS. We are going to use dnsmasq as our DHCP server.
1
# apt-get install dnsmasq
Now edit the /etc/dnsmasq.conf file. Add these 3 lines at the end.
Sqale is a japanese company compete with Heroku to provide developer friendly platform to host rails app.
Sqale is addressing some of the problems Heroku.
Server location - Heroku servers are in US which is quite far away if the target audience are in APAC area.
SSH access
Since your app is spread across many dynos in the dyno manifold, there is no single place to SSH into. You deploy and manage apps, not servers.ref
Slug size - Heroku limit it to a maximum 200MB.
Sqale provides server in Tokyo and gives developer a LXC container to work with. You can run cron job on Sqale without any changes if you migrate from dedicate server. So the platform dependent is lesser than Heroku.
For slug size, Sqale do not have a concept of slug. They give you 2GB of disk space for one container.
Pricing model
Sqale is charge by number of containers. Each one is ¥940 per month which is around 10USD.
How powerful is one container?
I am still testing out Sqale. Before I use Sqale in production I need to know what’s my operation cost.
Deploy a sample app
I always want to try out Swordfish. So I deployed it to sqale. The process is not too hard. But therer are lack of english documentation. I can only just guess what the console mean and try my best. Support from sqale is really helpful.
Static file test
I don’t want to test dynamic content yet. So I created a blank index.html in public/ directory and see how their nginx perform.
First error start to occur when concurrent connection is about 815. The total error rate is 3% is not bad.
You can scale out by adding more container to your application. But from what I understand from their website seems you can only add 4 more containers to your app. So maximum is 5 containers per app. I am not sure it is a technical reason or you can add more by contacting Sqale.
It also seems that they will help you do some ddos mitigation behind the scene. After the c1k rush I cannot run a smaller test on it. All requests are timeout.
SoftEther author contacted me to highlight serveral points:
On physical server, local bridge will perform better than SecureNAT
DO NOT enable both local bridge and SecureNAT at the same time. Packets will loop infinitly and make your server 100% CPU usage.
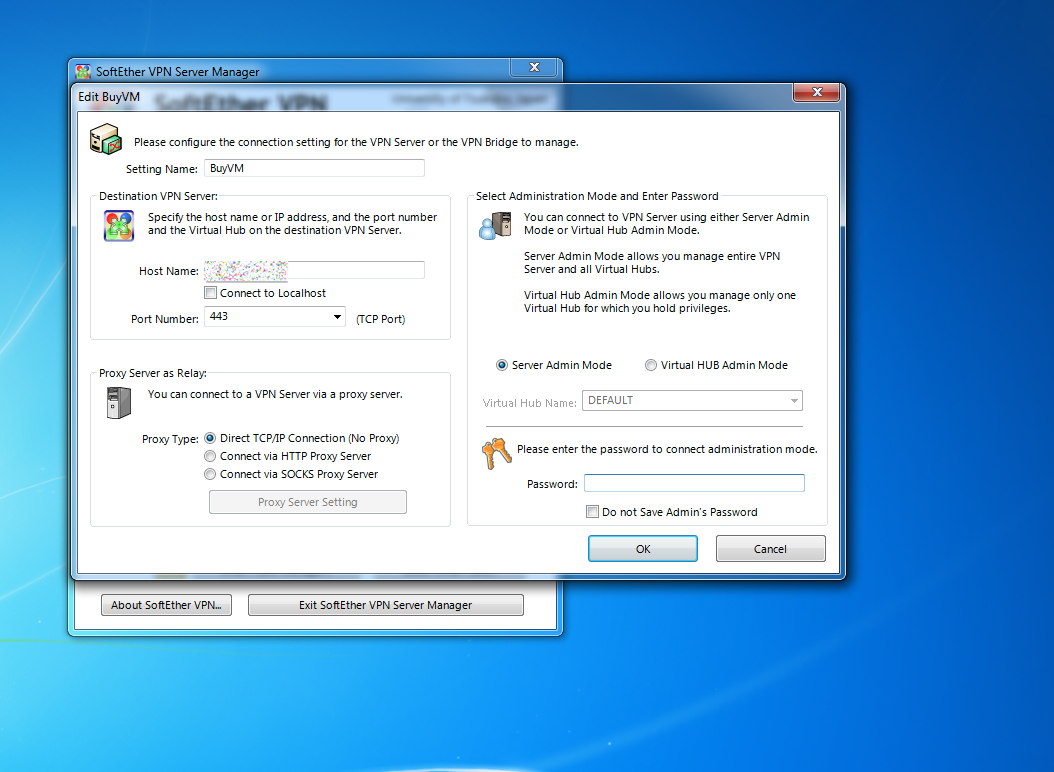
Requirement: VPS
I am using vps from buyvm. I got from a year deal which is USD12/year. I would recommend Ramnode(affiliated) as a VPS provider. Their VPS is speedy and support is amazing.
Spec:
RAM: 128MB
Burst: 256MB
Disk Space: 15GB
Bandwidth: 500GB
Location: Buffalo, USA
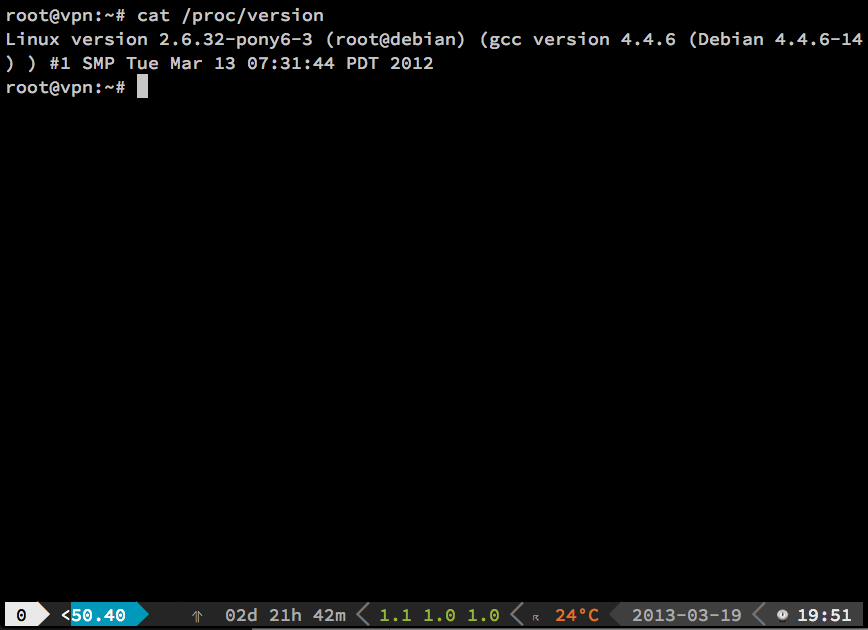
OS:
Debian 6.0 64bit (minimal)
Make sure you login root as follow:
Before installing SoftEther Server let us install some prerequisite.
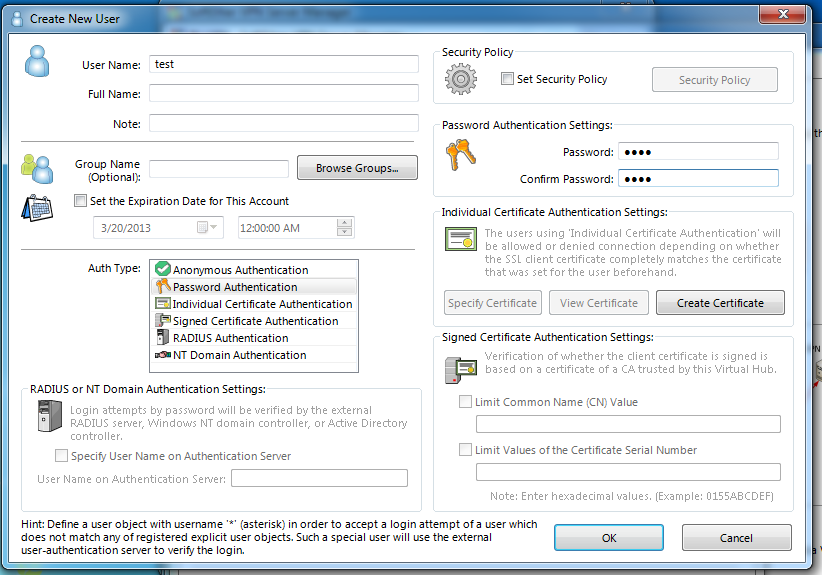
There are often times in developing a CMS need to mark down who created the record. Django provide a nice admin interface for us. But when we only use the default, user need to select who they are by themselves. We want to auto select for them and they can’t pretend to be others.


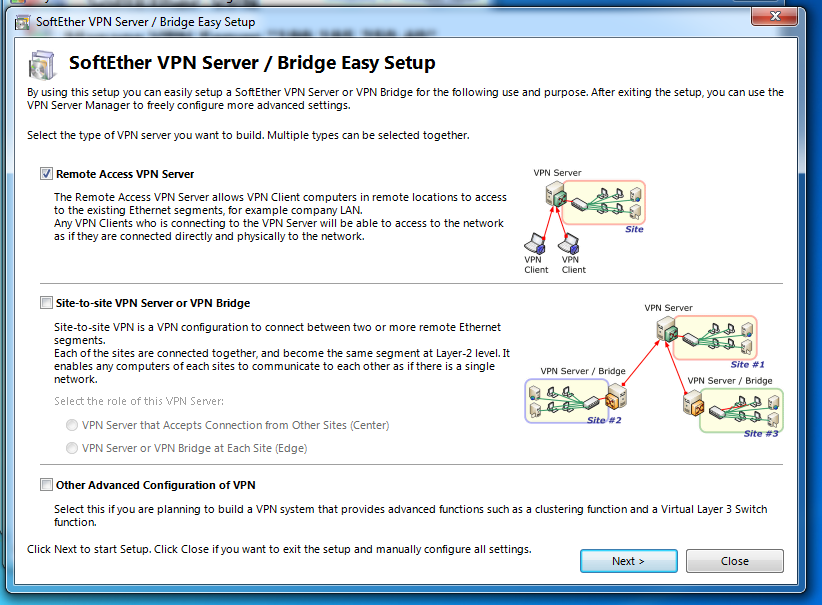 Check Remote Access Server and Next

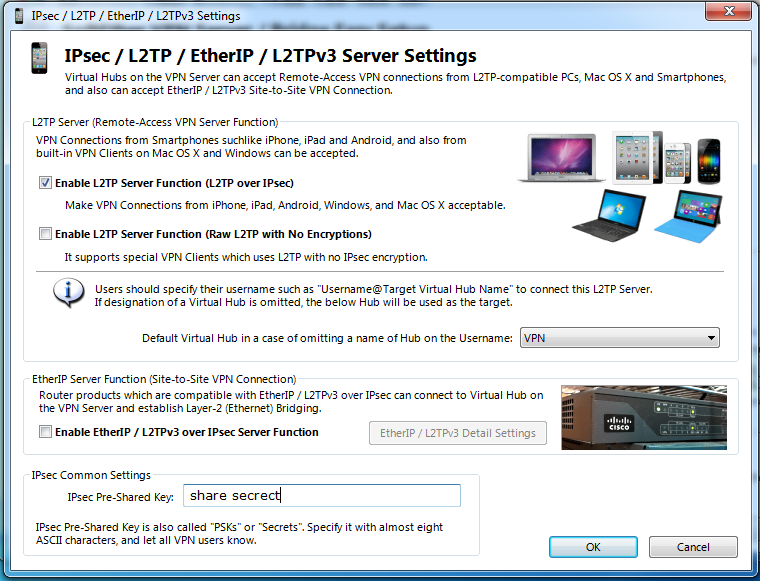 Check Enable L2TP Server Function and input your own pre-share key
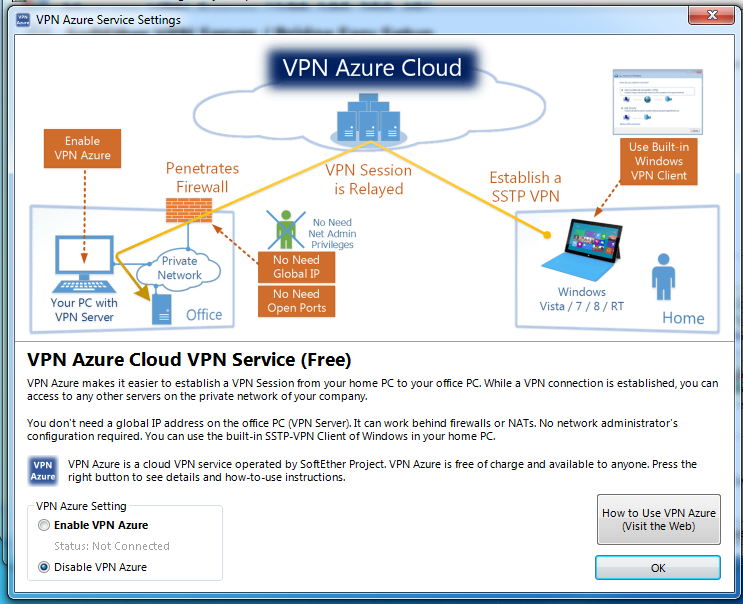 We disable Azure VPN
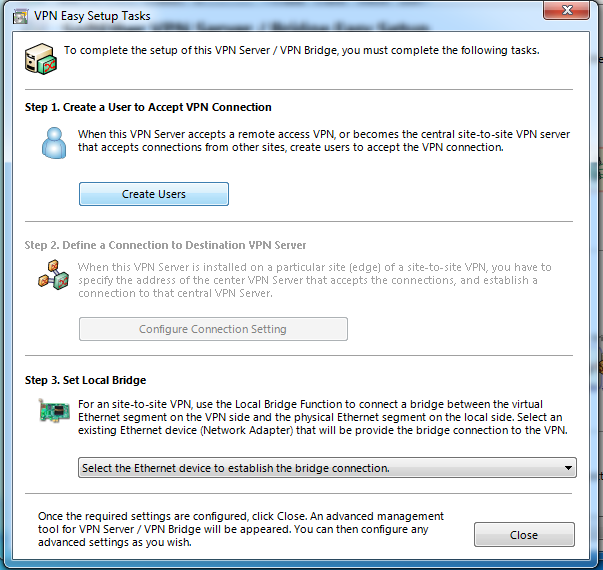
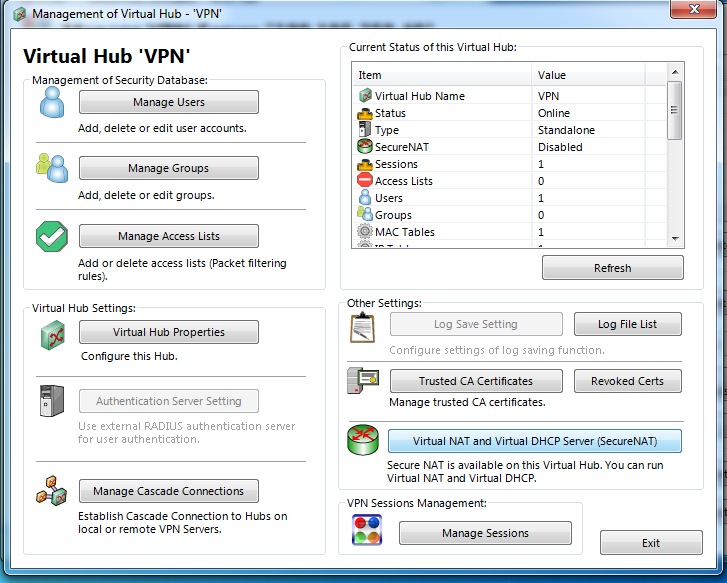
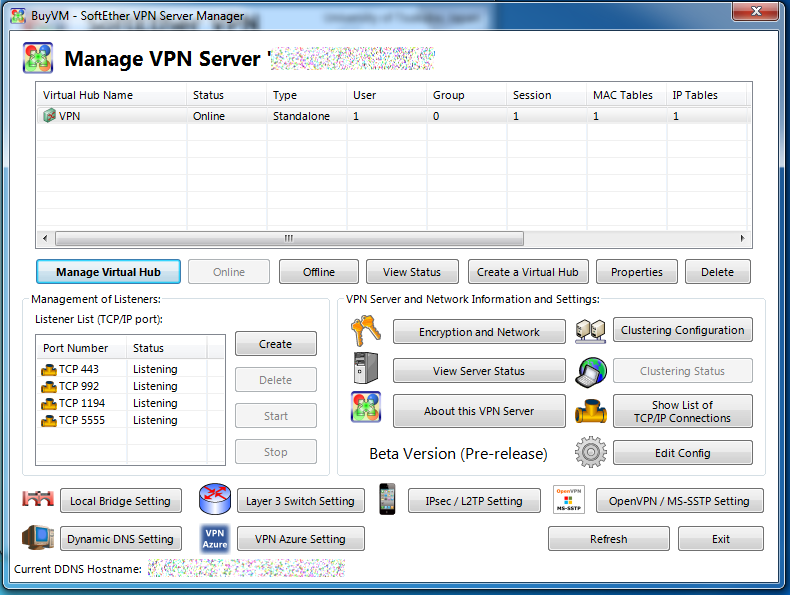 Click on “Manage Virtual Hub”